I’ve been spending a lot of time on Pinterest these days. Yes, I finally get why people—women—lose themselves in Pinterest: it offers the most extravagant, indulgent fantasy shopping experience in the world, and no credit card is required. Now I’m losing myself there, too, scanning images and clicking away. I’ll take one of those, oh, and one of those. We can shop, and then, perhaps most satisfying of all, we can return to our own Pinterest home page and survey and organize all of our glittering acquisitions. (“Home” page is an apt moniker; the images we collect and arrange there might represent the home of our imaginations, the home we long for, the home we will never, ever, in a million quadrillion years, actually have in the material world). As I’ve written in other posts, I’ve come late to the platforms (Facebook, Instagram, etc.) in which others have lived comfortably for years, and while I now have my own accounts on those platforms, I don’t have an affinity for, or attraction to, social media in general. Despite my dependence on these platforms to drive traffic to this blog, I find myself gradually falling away from them. I just can’t get into it. But Pinterest offers something that is simply irresistible: an opportunity to attain (virtually) the unattainable. You should see, for example, the amazing collection of antiques I’ve amassed there; it’s worth millions! On Pinterest I’m the curator of my own museum, the mistress of my own mansion, and a tourist in a beautiful world of my own creation. Anyway, yes, I finally get it. Pinterest is awesome.
I mention Pinterest because in some ways this post on how to make a hanging earring display is tailor-made for Pinterest (and yes, it will ultimately end up there). I don’t do a lot of posts on crafts—and for good reason: I’m not very crafty! But this earring display is a craft you can make yourself—if you have a substantial block of time, all the proper supplies, a sewing machine (do people still have those?), and an infinite reserve of patience. You see, this is where my little post dispenses with the Pinterest DIY template and tells it like it is: making a burlap earring hanger is not something you can do in “ten minutes” or “five easy steps.” A hanging burlap earring display is deceptive in its simplicity; doing it right is tricky.
I’m getting ahead of myself, here. Let me begin again…
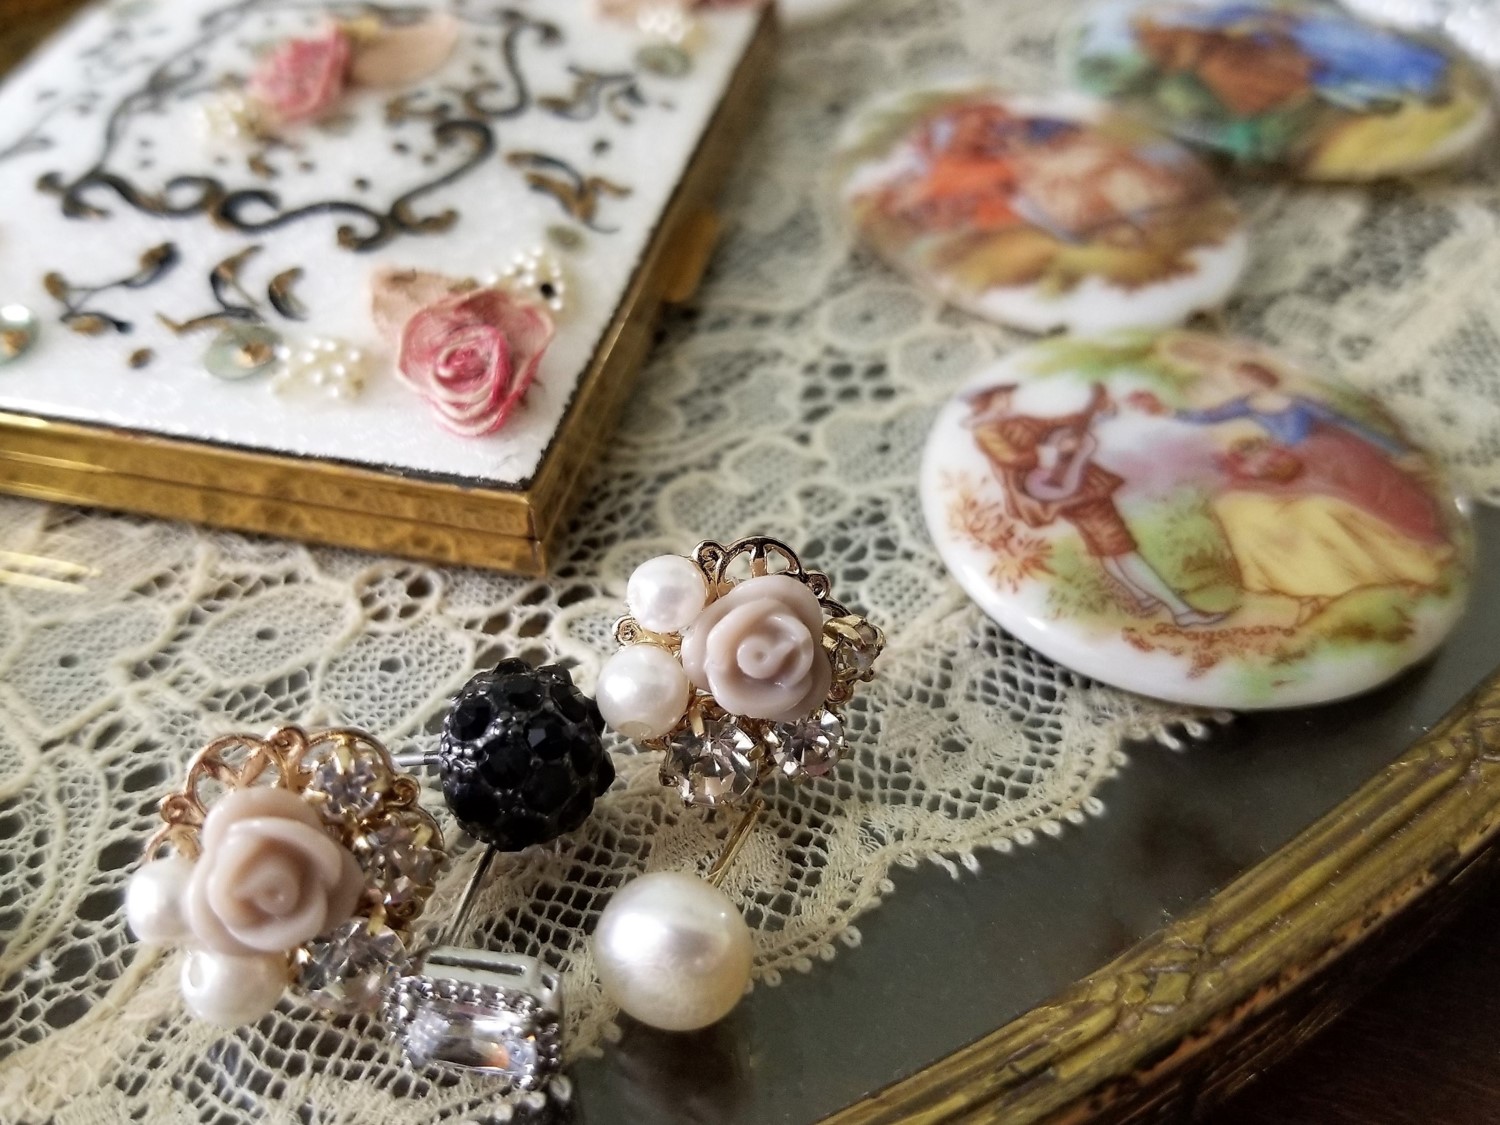
I know a new season has begun when I walk into my clothes closet, scan the contents, and stand there, hands on my hips, hating everything. The cute things don’t fit anymore; the roomier things look dour and matronly. Then there are the colors: all wrong. Who bought these things? A different version of myself, who, long ago, thought chartreuse was a good idea. Upbraiding my closet when I need to swap out long sleeves for short is a rite of spring that occurs with precise regularity. My accessories, on the other hand, are more reliable; I’ve had many of them for years, and they hold up well from one season to the next. This is particularly true of earrings. My classic pearls, jet black facets, and dainty gemstones and zirconias are evergreen and easy, steady and true. My only complaint about them is that they tend to gather into chaotic little piles on top of my dresser. The pearls I wear most often obscure the other earrings, which I tend to forget. And then there are the earring backs: they travel far and wide. I’ve found strays in my sock drawer, on my fireplace mantel, between my couch cushions, and in Olive’s food bowl. I must have hundreds of them, and yet, when getting dressed in the morning, I often can’t find a single one. All of this is to say that “getting ready” can be a maddening exercise. People have been institutionalized for less.
Anyway, last week spring finally arrived (sort of) in Kansas City, bringing temperatures in the upper sixties and tiny lime green buds on the shrubs. So began the ritual: walk to the closet, pick through the merchandise, heave a heavy sigh. I finally settled on a light cream tunic and jeans for my day. As it turned out, the tunic was the exact color of my pale winter skin, so my face, neck, and tunic blended into a monochromatic smear of old white. I caught a glimpse of myself in the full-length mirror in the corner and the effect was startling; I was a ghost haunting my own house. I needed some color, so I looked to my jewelry drawer for help and found a bold, colorful, collarbone-length necklace with garnet-colored glass briolettes and a strip of black velvet woven through the links of its chain. Color, good. I found one of the matching earrings. The other was nowhere to be found. I was already running late for a meeting. Really, it was all just too, too much.
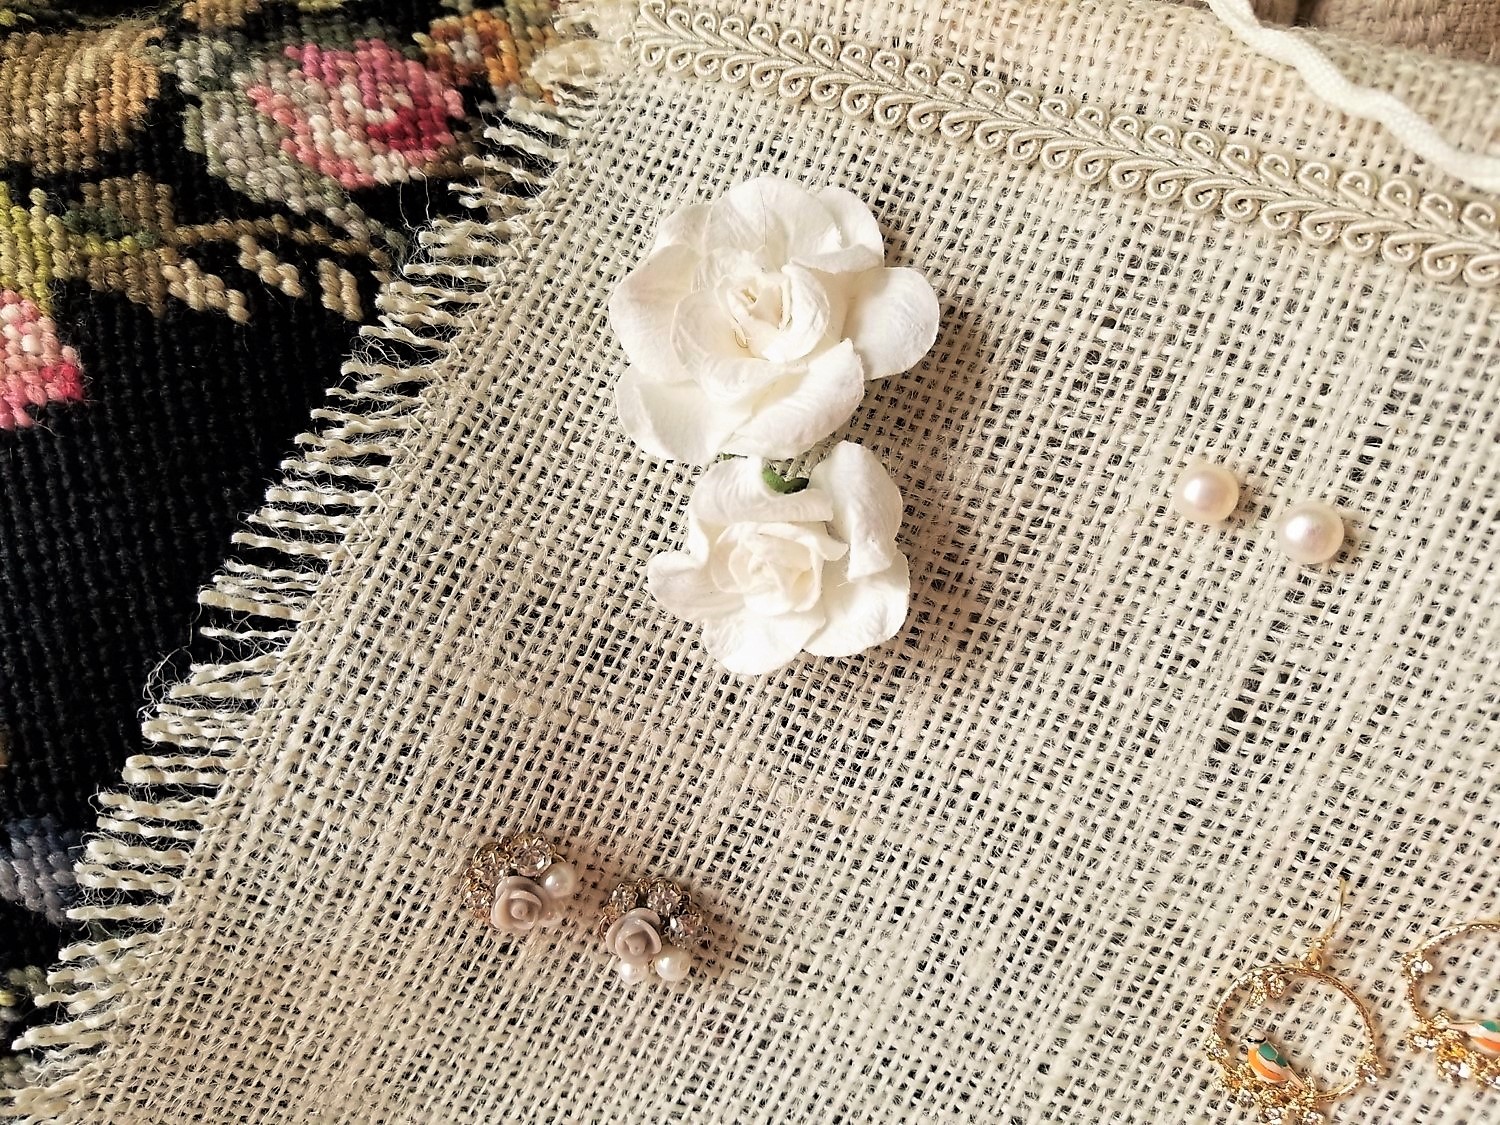
 Stray earrings on my dresser. How does this happen?
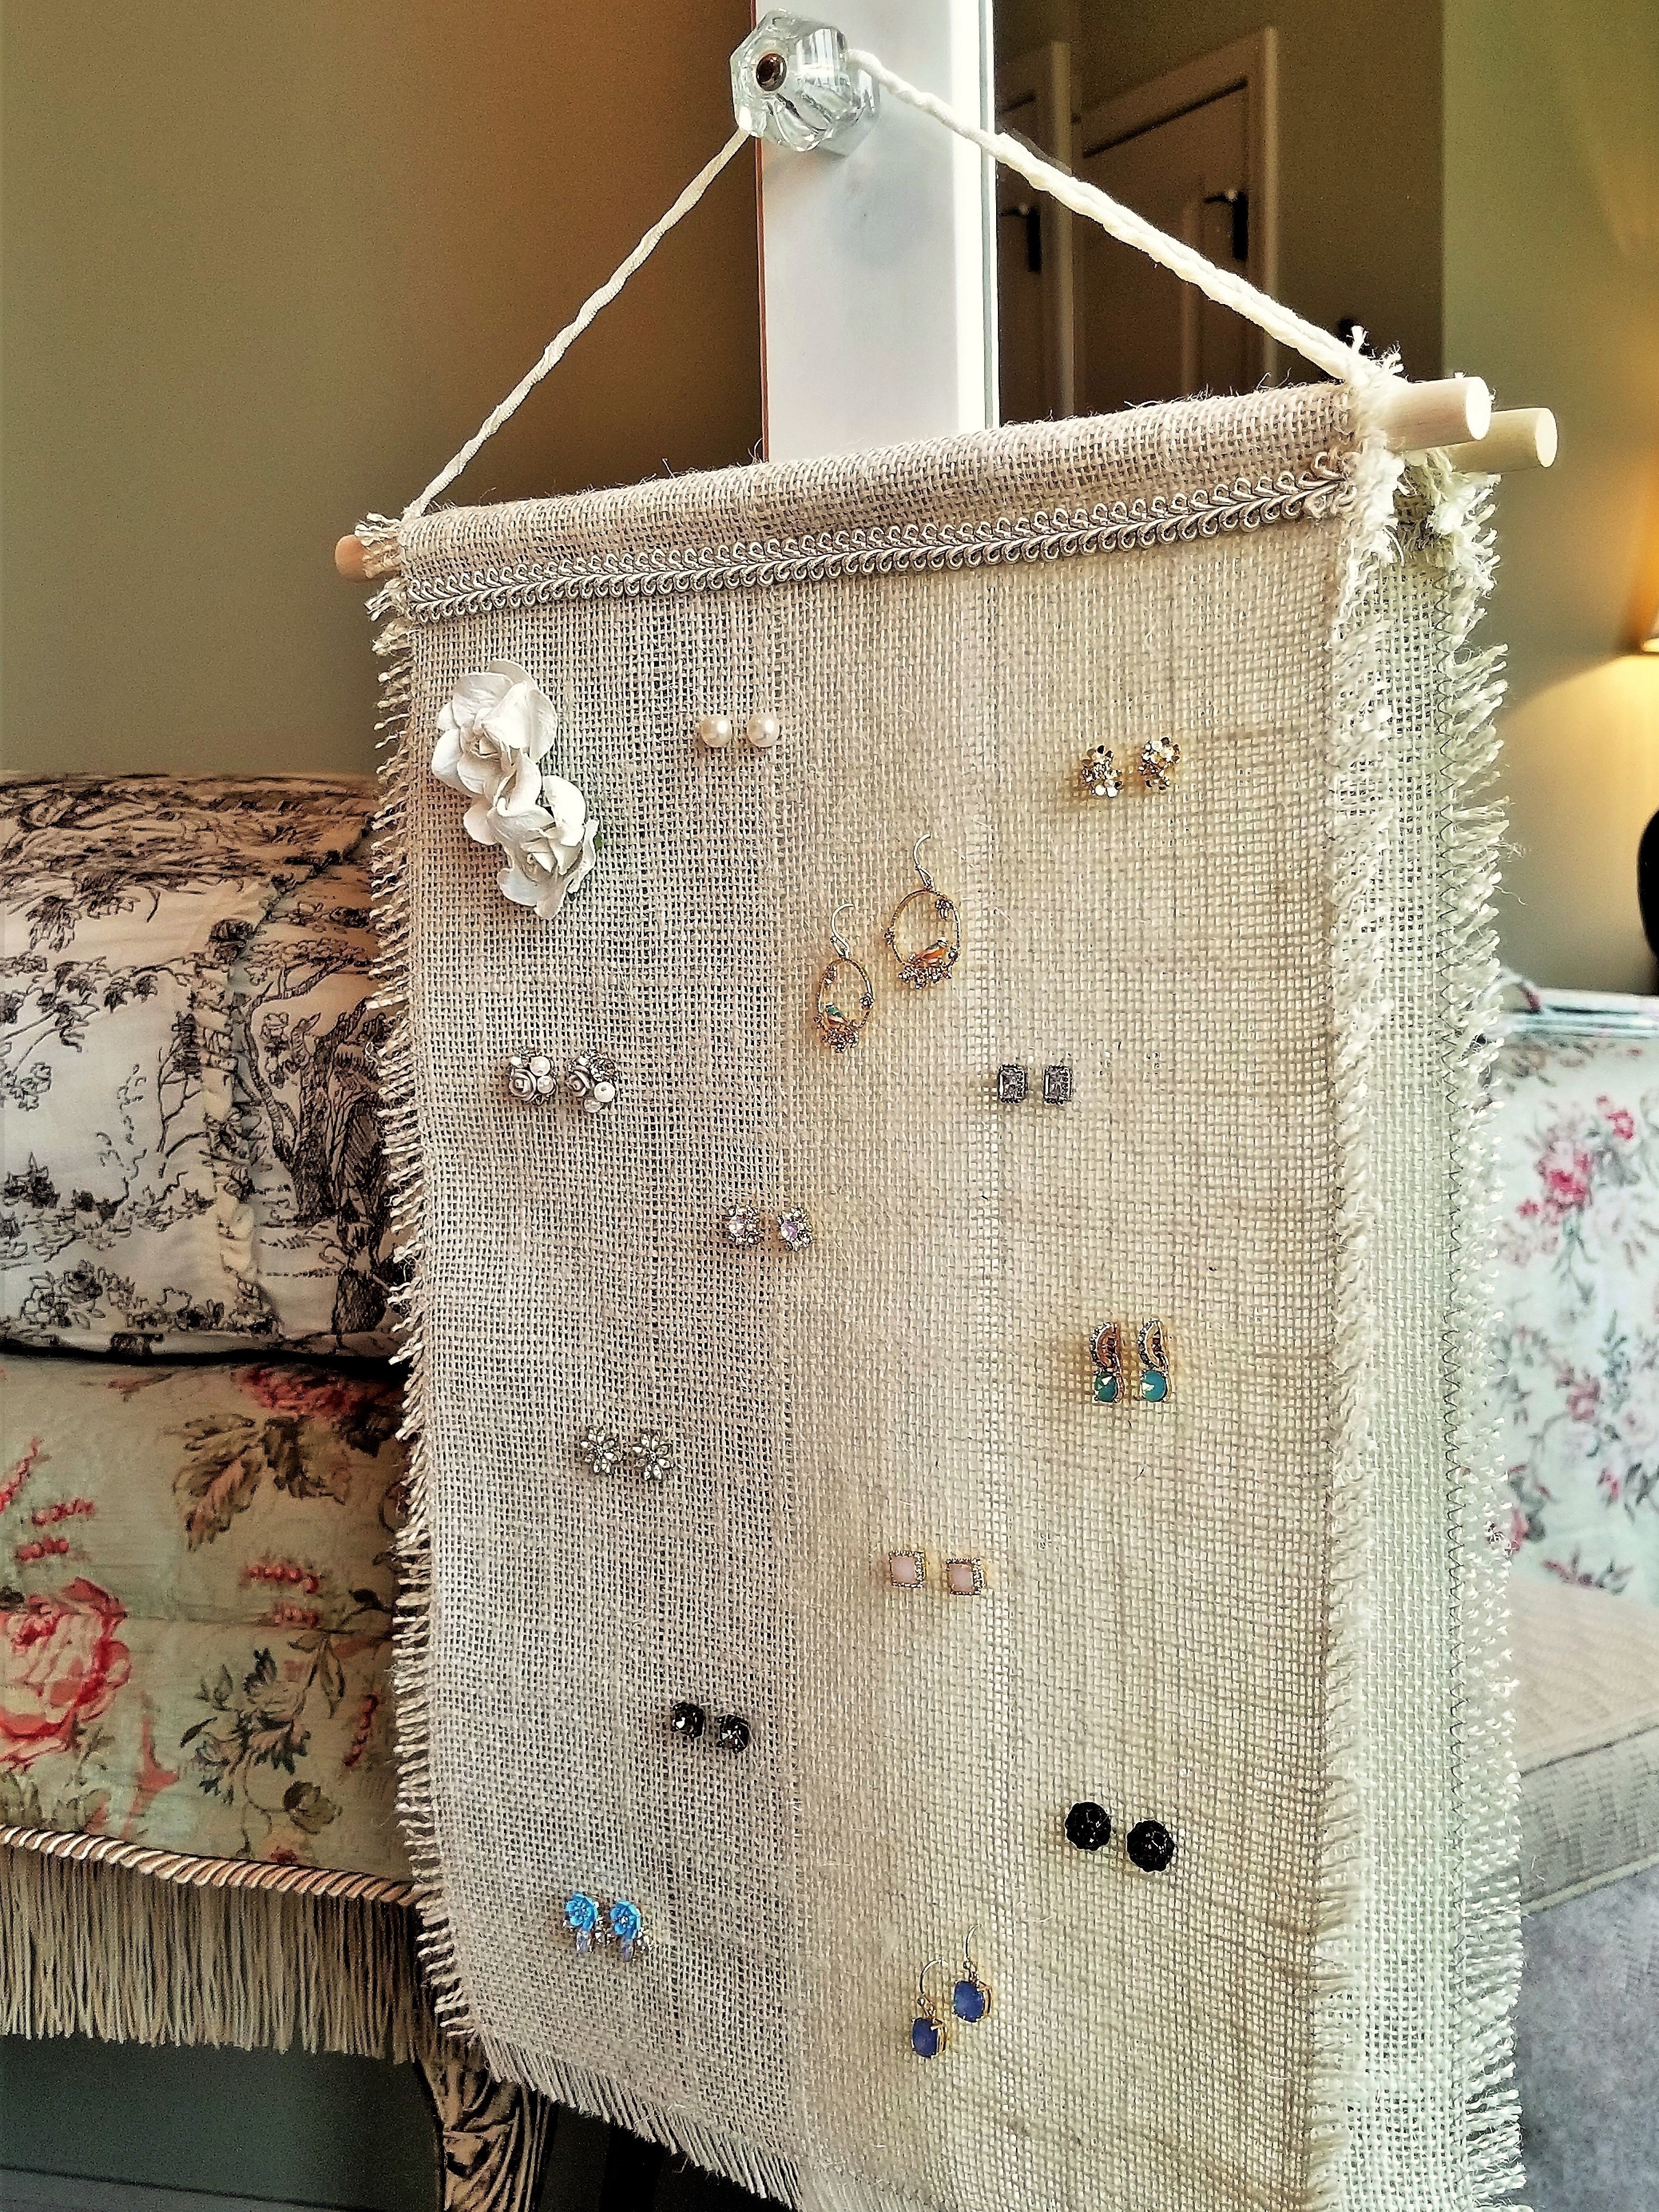
I know, not one of life’s great tragedies, but I felt, at that moment, an overwhelming desire to just throw an epic and cathartic tantrum and be done with it. I didn’t, though. I pulled it together, jumped in my car, and made the long commute to my job. (Incidentally, I had forgotten to take out the one earring I had found. I went through my entire day wearing only that one earring, like a pirate, which I only discovered at bedtime). It was on that commute that I had a flash of memory—a mental snapshot from childhood I had forgotten, now suddenly vivid again as I sailed passed a caravan of semi-trucks along north I-29. At one time, not long after I got my ears pierced, I had a square of burlap that had been fashioned into an earring display, hanging on the wall of my bedroom back home. It was a small piece, not quite a square foot, but it was dazzling to look at because it was dotted with dangles and hoops and faux gem studs that caught the light and cast it, refracted, on my little writing desk. Geez, what memories we have stored in our brains. I hadn’t thought of that burlap hanger in decades. Now here it was, almost as present to me as the U-Haul dead ahead, laboring up a steep incline. My mom had made that hanger. She was meticulous then, as she is now, so I know that square was perfect. She had crocheted a small rope of yarn, an exact match for the burlap, which she fastened on a dowel so it could be hung, suspending the burlap flap below. It was an ingenious design, really, doing double duty as an organizer and as wall art. Utilitarian and beautiful. It was exactly the thing I needed now to make things right in my grown-up closet.
That weekend I asked my mom if she remembered that hanger; she did. In fact, she had one of her own. I asked her if she would consider making one for me, and she did. The procedure is documented below.
Now, I have to explain that my mom is both an artist and a perfectionist when it comes to sewing. She has sewn complicated gowns for weddings, Halloween costumes, home decor items, and, of course, clothes. She made an amazing and ethereal gold curtain with an organza overlay for the tabernacle on the altar of Our Lady of Good Council church in Kansas City, one of our town’s most beautiful places of worship. In comparison, she considers this burlap project a simple little no-brainer. But I watched her make it from start to finish, and it’s completely beyond my capabilities. It’s not that the steps are difficult; the blueprint is quite simple. The challenge lies in its neat execution. It’s the neatness that eludes me.
Without further ado, here is how she did it…
How to Make a Hanging Burlap Earring Display
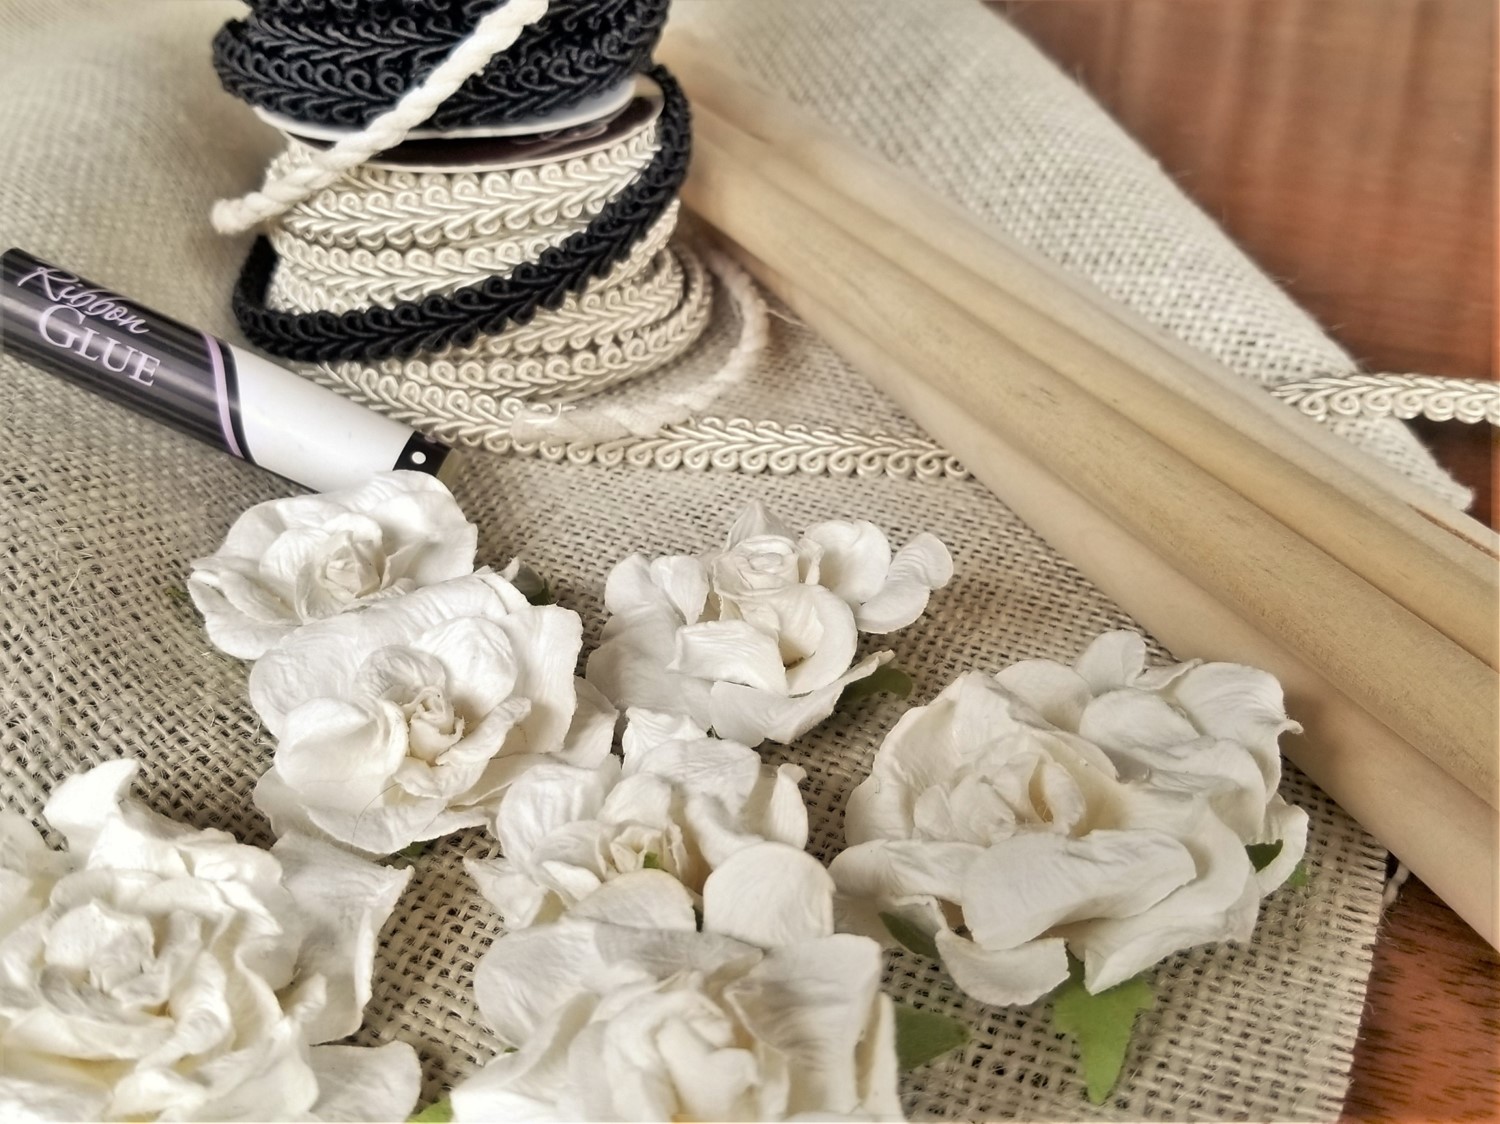
STEP 1: ASSEMBLE THE MATERIALS
Burlap. The finished piece is 11″ wide by 17″ long. You’ll need more than this to allow for fringing the edges, folding the burlap over the dowel for hanging, and scrapping mess-ups.
A Wooden dowel. We used a dowel that was 12″ long and 1.25″ across
Scissors.
Ribbon trim.
Flowers or other embellishments. These are optional. Remember that your earrings will ultimately be the focal point, so no embellishment is really necessary. However, we like flowers, so my mom’s version has a couple of them positioned in one corner of the finished piece. This is what the glue was originally for, however, my mom didn’t use this glue; she tacked the flowers on with needle and thread.
Cord to hang the finished piece. (Not pictured here).
A sewing machine.
A drill.
All of our materials came from Hobby Lobby.
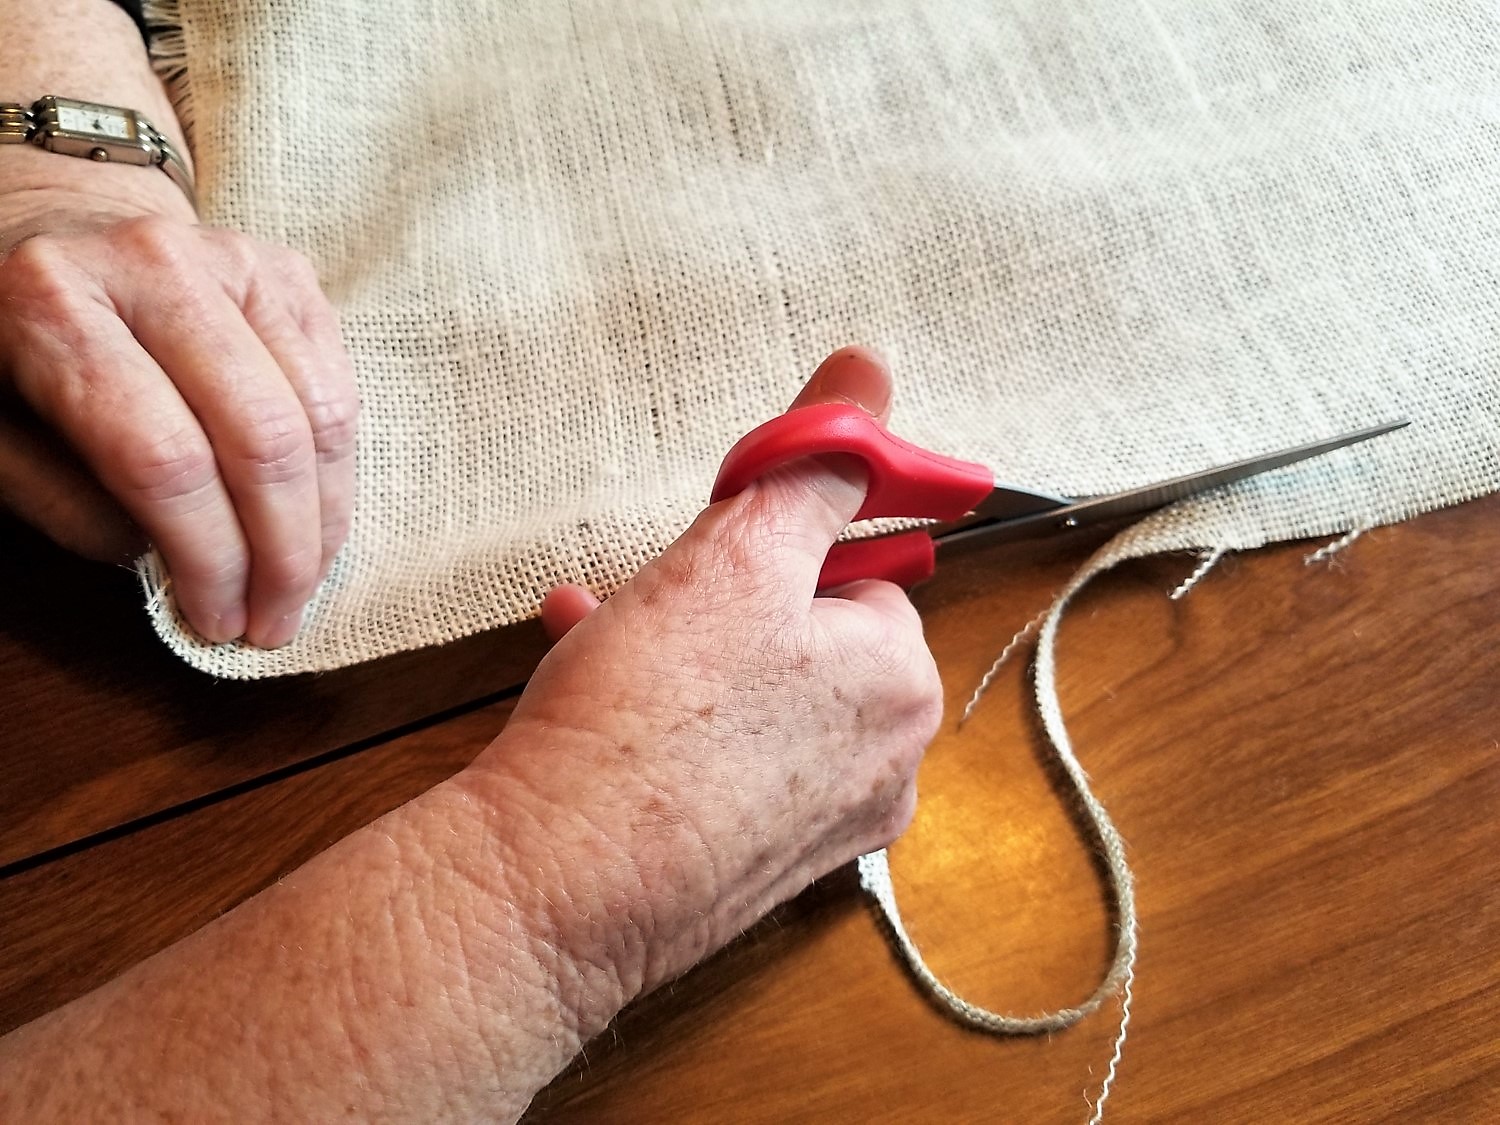
STEP 2: CUT THE BURLAP TO THE RIGHT SIZE
It’s important to cut the burlap in a straight line, following the weave. If the cut is off, the resulting flap will look sloppy. When cutting, the width is more critical than the length. The dowel needs to be about a half inch longer than the burlap on both sides.
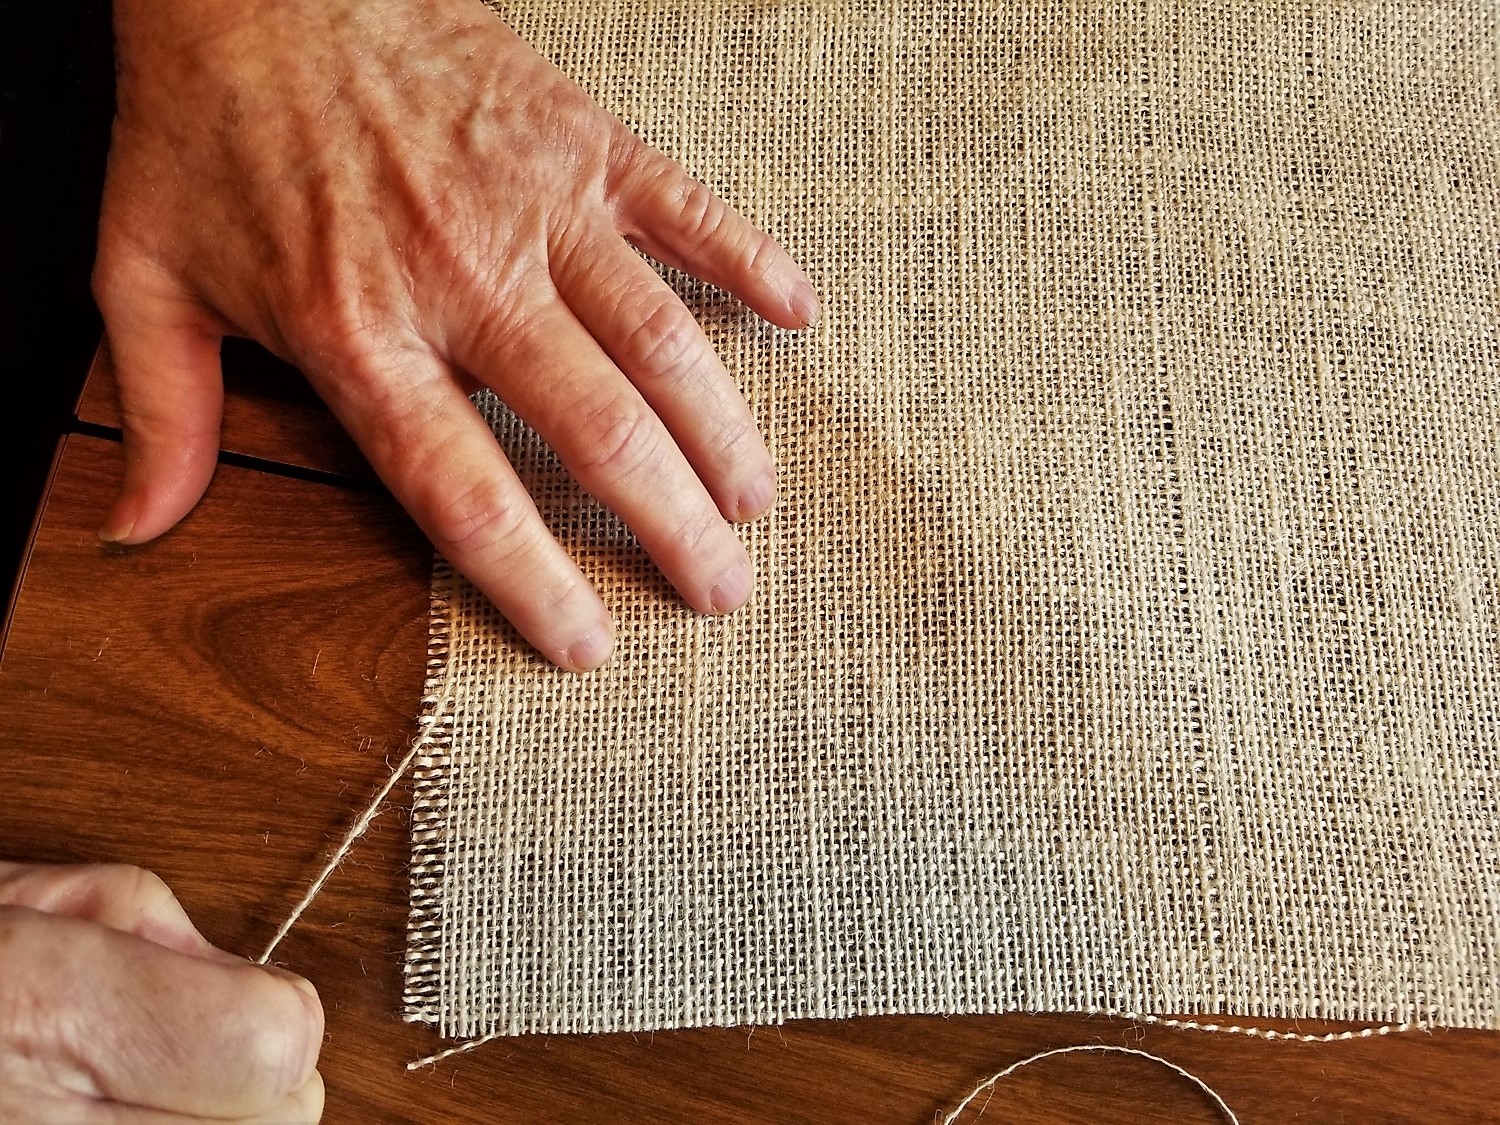
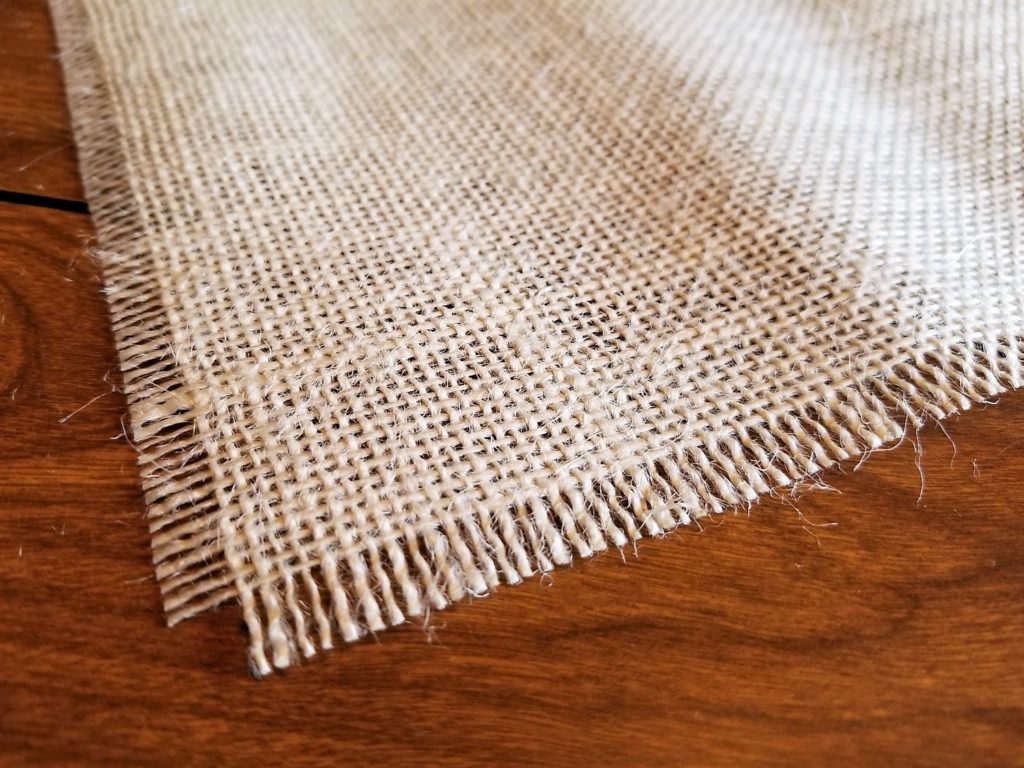
STEP 3: FRINGE THE SIDES AND BOTTOM OF THE BURLAP
Fringe the sides and bottom by carefully pulling out strands from the weave. Our fringe is about half and inch wide; you can make yours wider or narrower, whatever you prefer.


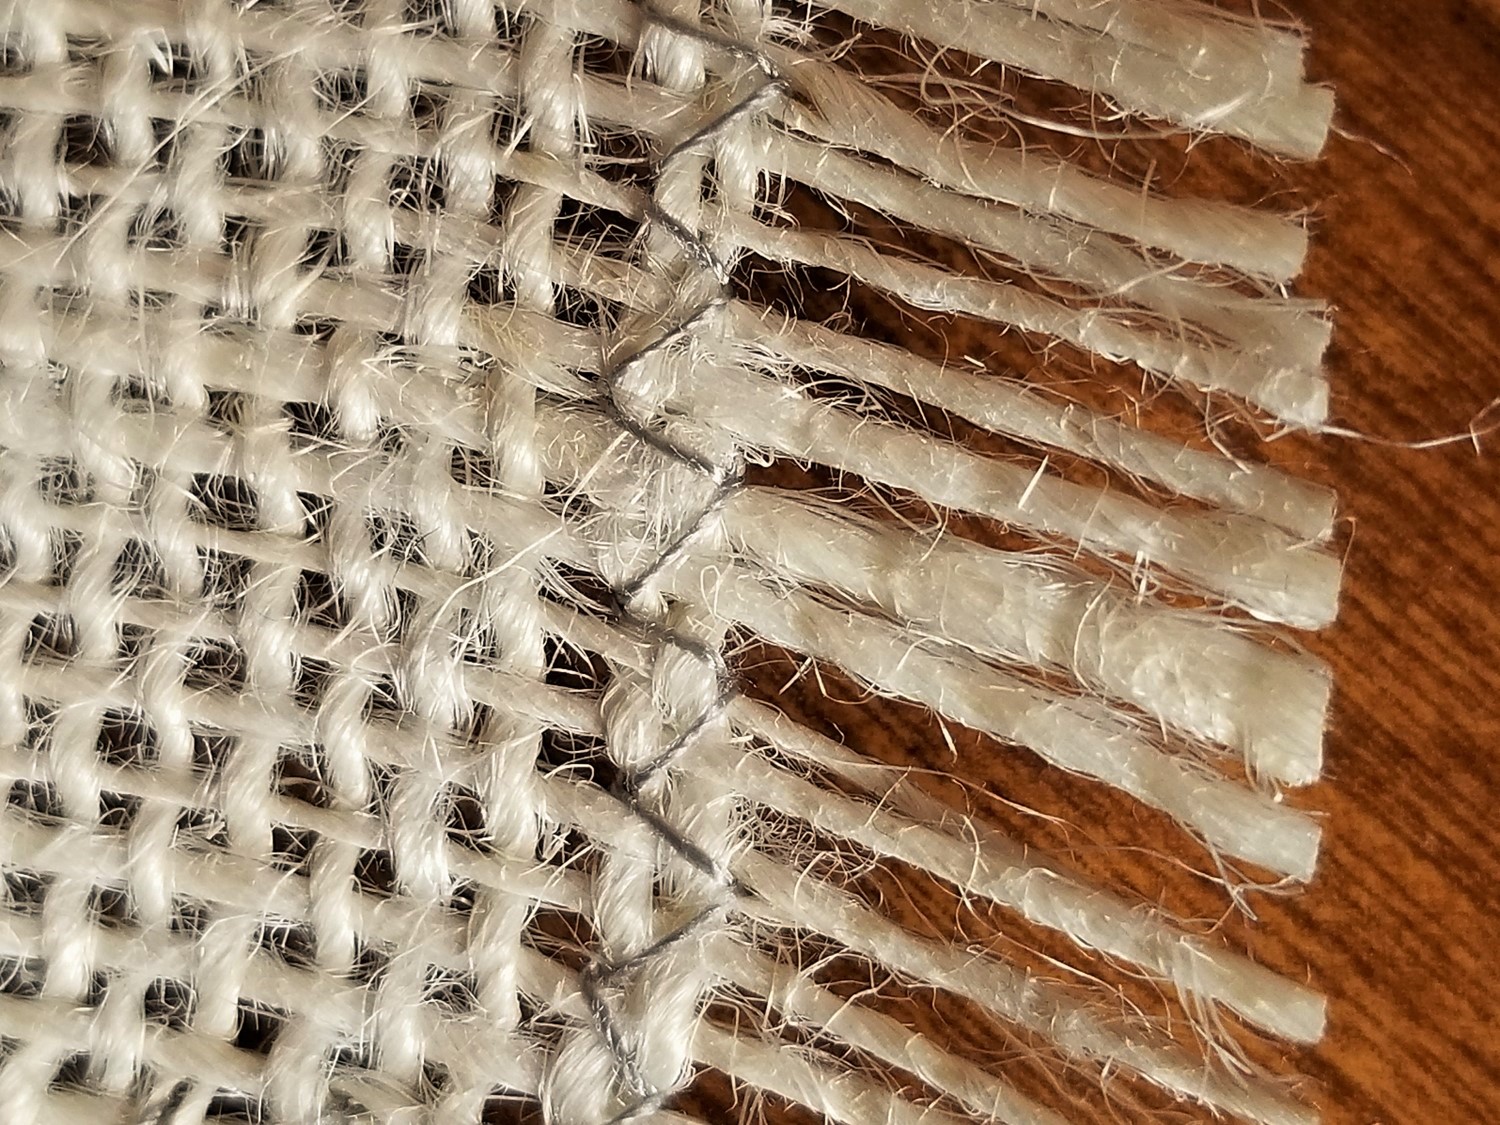
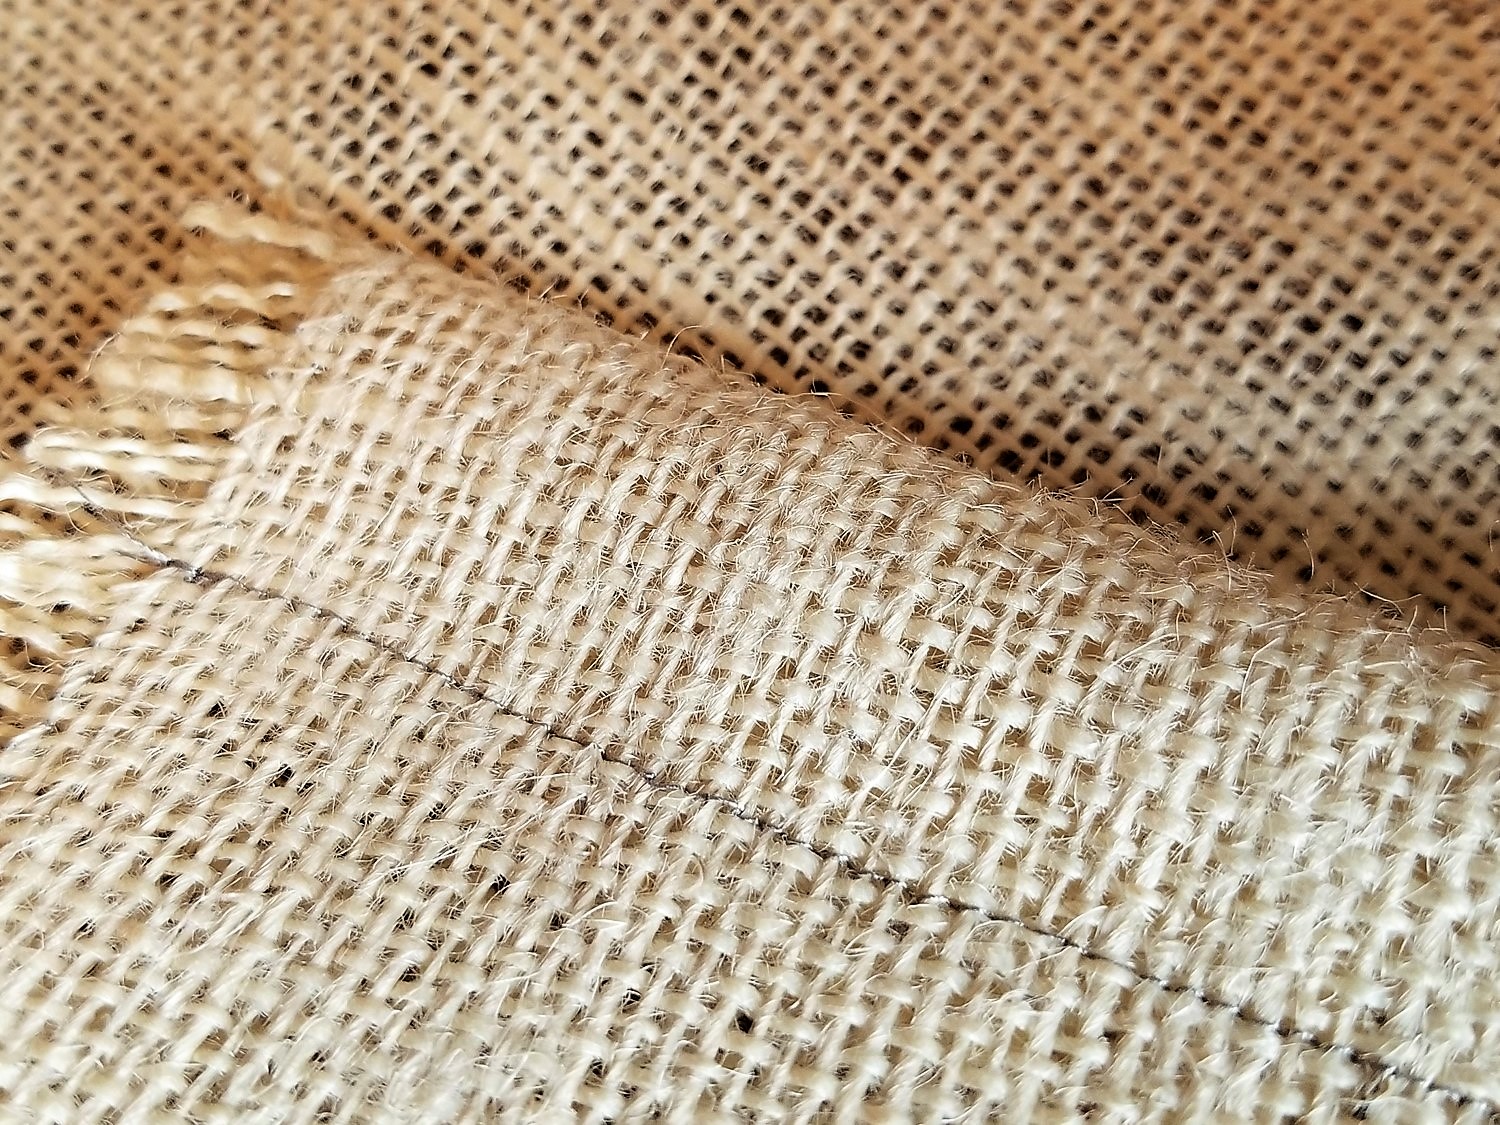
STEP 4: SEW THE EDGES TO PREVENT THE WEAVE FROM SLIPPING
This is the part of the process where I would start to lose my marbles. This is a critical step; if you skip it, the threads of the weave will start to move over time as you put earrings on and take earrings off the burlap, and those once-pristine and pretty fringes will start to look weird. My mom used a zig-zag stitch to secure everything in place.
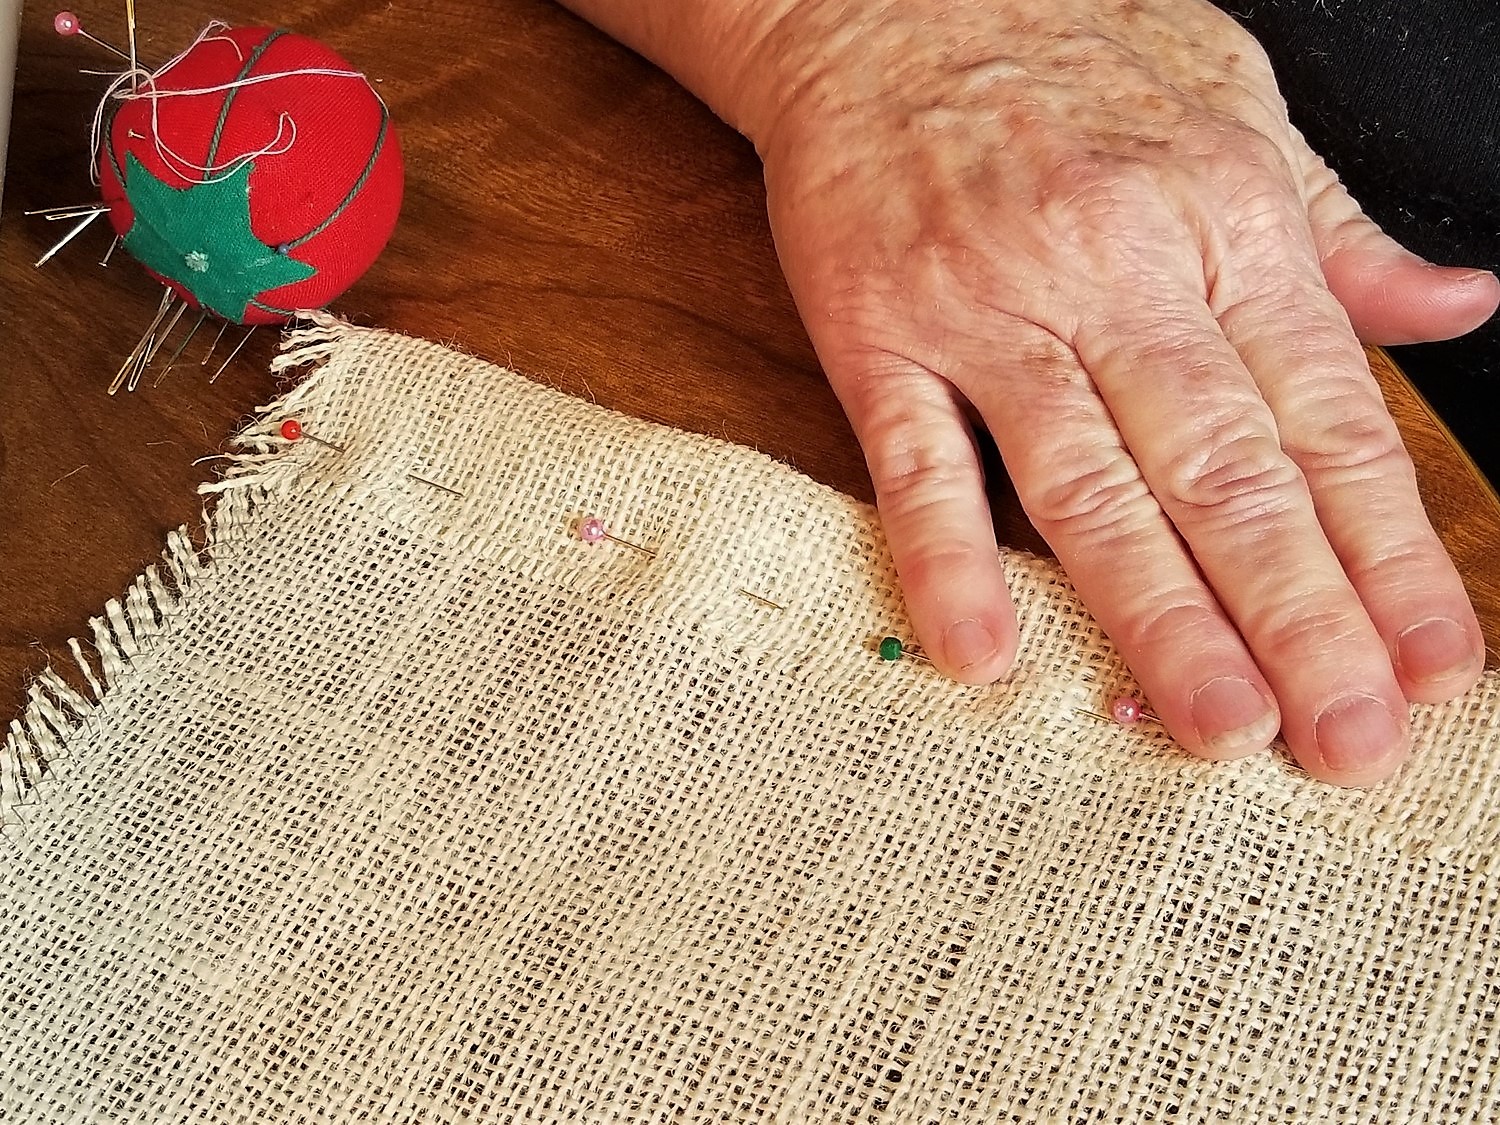
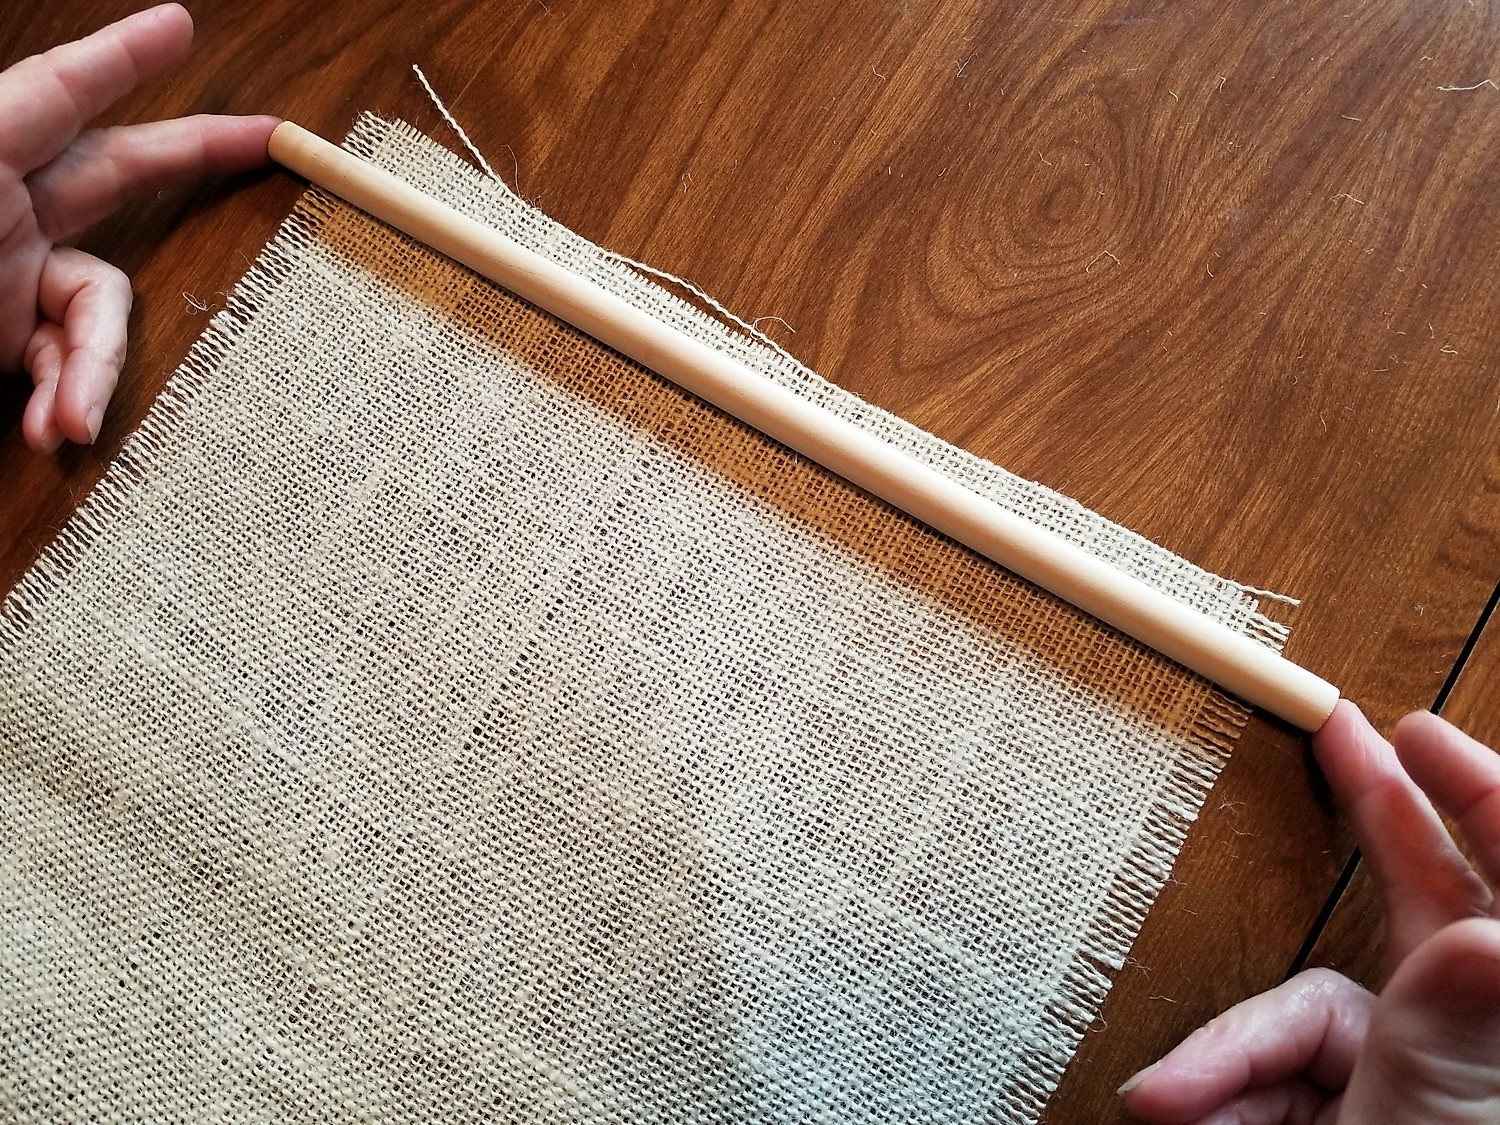
STEP 5: PIN, THEN SEW, THE TOP FLAP OF THE BURLAP THAT WILL HOLD THE HANGING DOWEL
More sewing. She didn’t use precise measurements here. Instead, she just folded the burlap over the dowel to get a sense for the width needed, then pinned it in place. While still pinned, she slid the dowel in to check the size. She then sewed the flap in place.

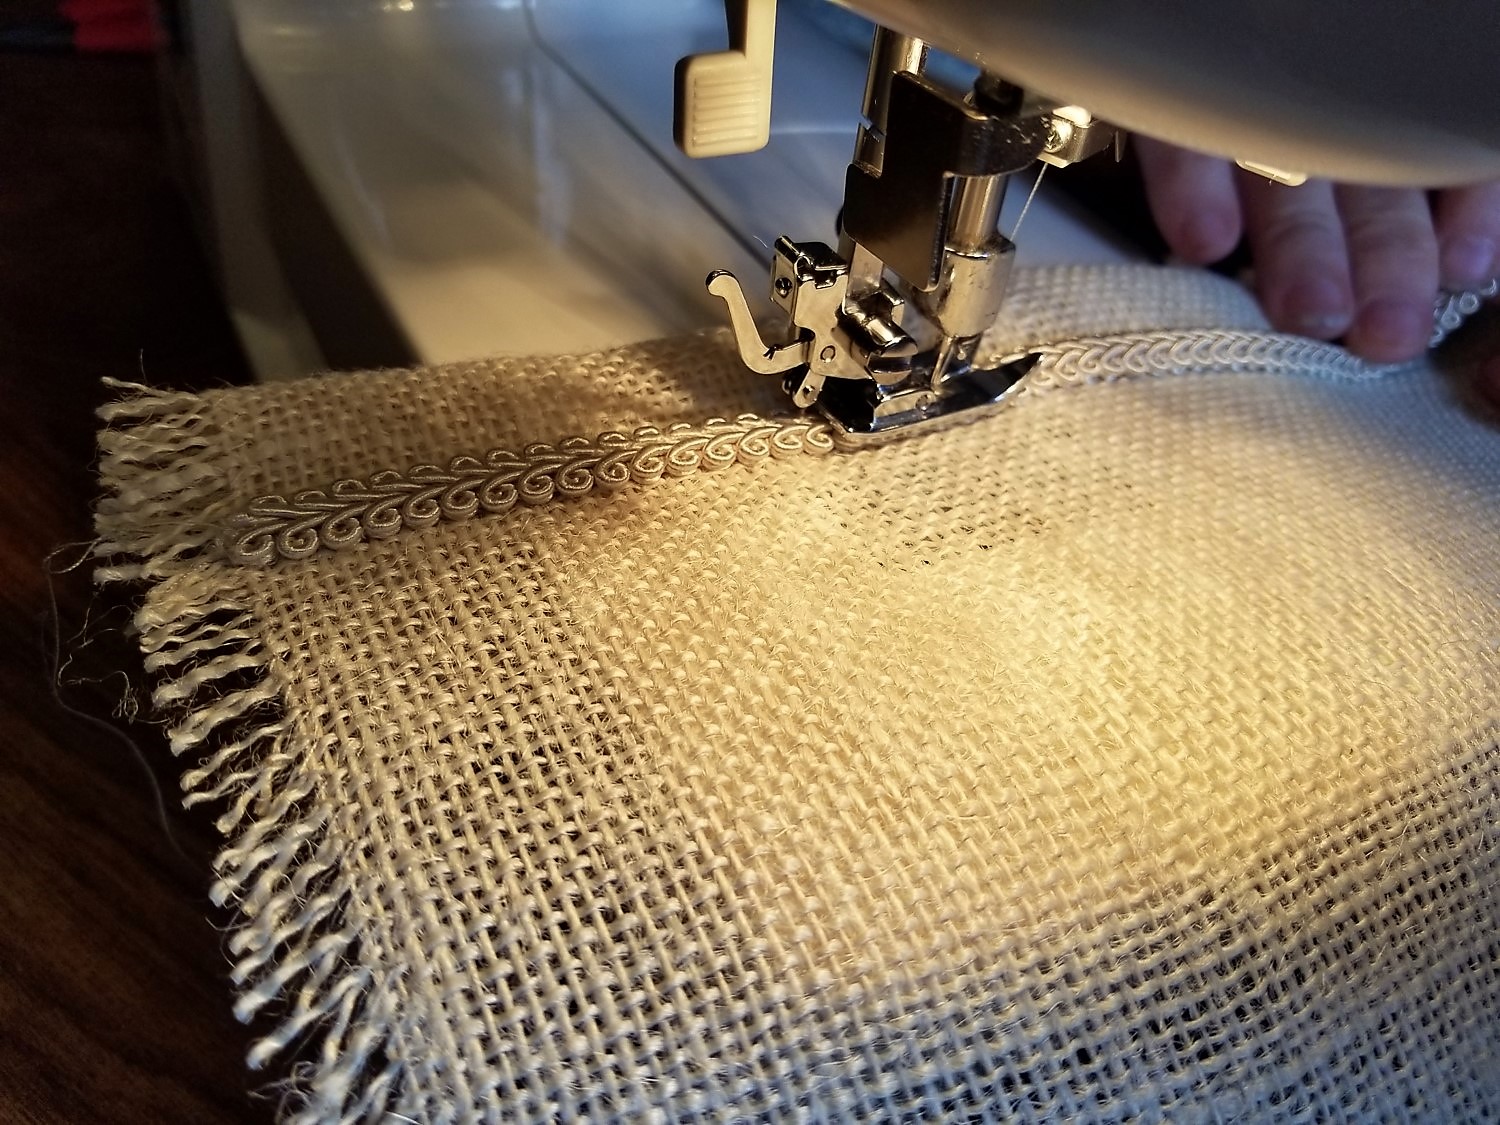
STEP 6: SEW A LENGTH OF RIBBON OVER THE STITCH AT THE BASE OF THE DOWEL LOOP AND, IF DESIRED, SEW ON ANY OTHER EMBELLISHMENTS
This step isn’t required, but it adds a nice finish to the piece.
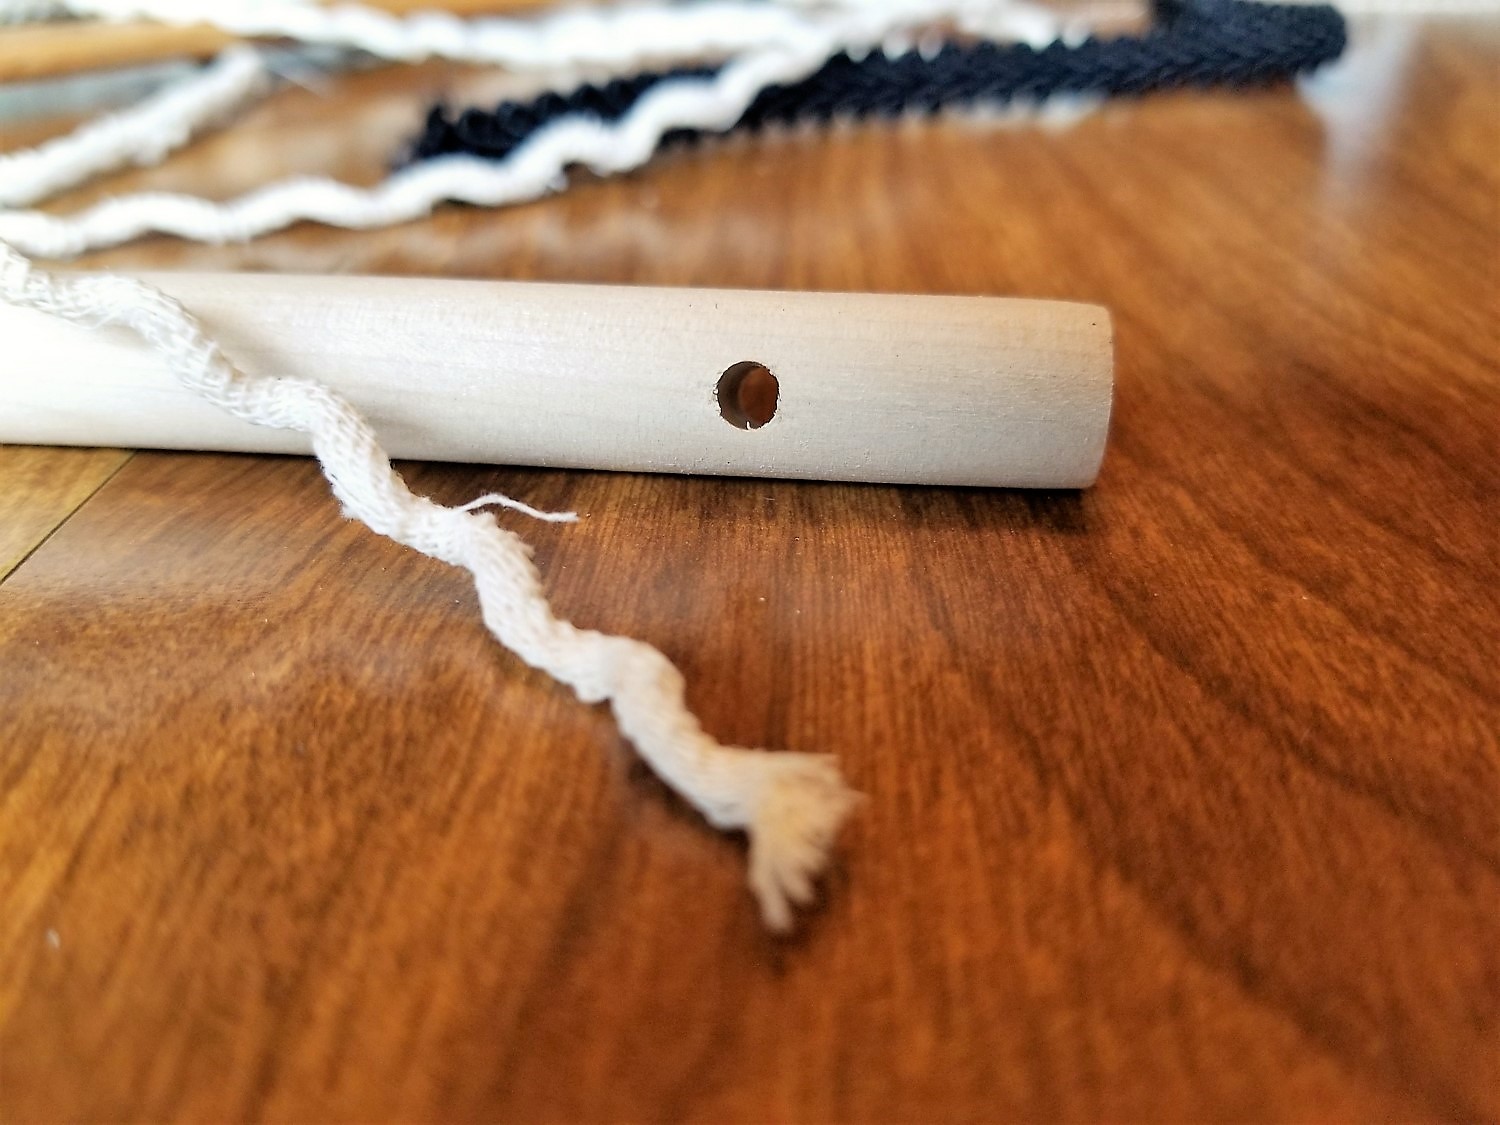
STEP 7: DRILL A HOLE ON EACH SIDE OF THE DOWEL
This was my dad’s contribution to the project. He drilled a hole a half inch from each end of the dowel. The size of the drill bit will vary, depending on the size of the cord you will use to hang the piece. Dad used a 5/32 drill bit.

STEP 8: THREAD THE HANGING CORD THROUGH EACH HOLE IN THE DOWEL
Slide the dowel through the top of the burlap, then thread the cord through each hole. Knot each end of the cord to secure.
STEP 9: LOAD UP THE BURLAP WITH EARRINGS
This is the part I did. This piece is big enough to hold my entire earring collection—and all the sets I have yet to acquire. The best part is that it’s really beautiful. It is now hanging in my closet, pretty as a picture.
*****
I’d like to thank my mom for making this earring holder and helping me with this post. I’d also like to thank her for her ongoing encouragement as I continue to build Circa 19xx. She’s my biggest (and perhaps only) fan (smile).
Until next time…